|
| |
|
Everything
is concealed in nice black wire tubing, routed neatly and
held together with zip ties. It all adds up to a clean look.
|
| |
| |
|
|
| |
|
|
Let's
look at the junction box for the starter wires. Usually
the starter wires go straight to the starter. If you want
to pull the starter, half of the pain is getting the wrenches
on the nuts at the starter to disconnect the wires. In the
left photo Steve is pointing to the starter wires that have
a nut connection. In the right picture is a quick-disconnect
for the solenoid wires. Now if I need to pull the starter
all I need to do is disconnect the large wires with the
nut and unplug the solenoid wire. When the starter drops
out it will take the wires with it. Nice!
|
| |
|
|
| So
under the hood is done and here's the wire that was pulled
out. But wait, we're not even CLOSE to being finished! |
| |
 |
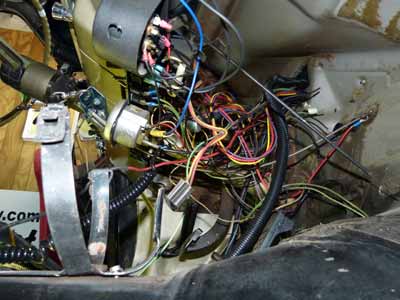
Let's
get into the interior. What a mess! When I would add a
gauge or an accessory I would tap into the existing fuse
block. I would route the wire so it was out of the way
and that was about it. As long as the gauge or accessory
worked I was happy. Racers, I almost don't want to share
this because it's so embarrassing, but perhaps you have
a similar situation.
|
| |
|
|
|
Steve
is literally tearing into the Dodge under the dash. Look
at this! |
| |
|
|
|
Remember
my little blue switch panel with the toggle switches? Gone.
Steve opened up the radio area for a new, lighted rocker
switch panel. |
| |
| |
|
| |
Here's
the new fuse block that Steve made. Everything's labeled
and he even drew a schematic for me to keep for future
reference.
|

This
is Page 2
|
Photos:
The Dragtime News & Arlene Russell
|
|
|

